|
|
| Welcome to 3T! Please take the time to register and join in on the friendly,knowledgeable watch talk.Please note that not all registrations will receive an immediate activation e-mail.Those who do not receive an immediate notification will be activated manually within 48hrs. by an admin. without an e-mail activation url sent to you,you may then sign in using your username and password,if you feel there is a problem please e-mail us at timetechtalk@hotmail.com and include your name and username and we activate your account.Thank You! |
| Moderated by: 3T | Page: 1 2 3 4  |
|
|||||||||||||
| HELP | Rate Topic |
| Author | Post |
|---|
| Posted: Wed Jul 4th, 2007 10:26 pm |
|
1st Post |
|
canadajo 3T WIS 
|
Looking for help from my wis buddies...As I had stated in what I was wearing for today... I chose the Limes Tauchend, because I was going diving in Lake Michigan with my two boys ....I was 10 minutes into the dive and I looked at my watch, and was suprised to see what I thought was the paint dissolved on my bezel ...instead I realized that part of the bezel had come apart because part was still attached ...I was in 10 feet of water with great vizibility so we all looked for the part, but no luck ....I found it ridiculous that in fresh water for ten minutes the watch came apart ...I bought this watch from Watchbuys 6 mo.s ago .... is it under warrenty for that ??? Can I buy a full bezel somewhere??? Can it be fixed ??? Please help with any advice  
|
||||||||||||||
| |||||||||||||||
| Posted: Wed Jul 4th, 2007 10:36 pm |
|
2nd Post |
|
srh_pres 3T WIS 
|
Ouch... sorry to hear that CJ. It should have a 2 year limited warranty from the manufacturer which should cover a defect like this appears to be. Hope you get it fixed soon - course it does make you wonder whats in the water in Lake Michigan... :?
|
|||||||||||||
| ||||||||||||||
| Posted: Wed Jul 4th, 2007 11:03 pm |
|
3rd Post |
|
Skipdawg 3T WIS 
|
Do you still have your paperwork? Maybe contact Watchbuys tomorrow and see what they say. http://www.watchbuys.com/Terms.htm
|
||||||||||||||
| |||||||||||||||
| Posted: Wed Jul 4th, 2007 11:25 pm |
|
4th Post |
|
Paxman 3T WIS 
|
What a pisser, cuz. I am going to have to guess that is to be covered under warranty, though. Pain in the ass but it shoud come out all right in the end. I am bummed the watch performed like that too...
|
|||||||||||||
| ||||||||||||||
| Posted: Thu Jul 5th, 2007 01:18 am |
|
5th Post |
|
KenC Admin 
|
Should be under warranty. Bummer...glad Limes is not on my list!!!
|
||||||||||||||
| |||||||||||||||
| Posted: Thu Jul 5th, 2007 02:01 am |
|
6th Post |
|
NANDO-FERDZ 3T WIS 
|
What a watch!!! I just erased that LIMES on my list... Thanks for sharing and hope that it will get fixed soon.
|
|||||||||||||
| ||||||||||||||
| Posted: Thu Jul 5th, 2007 08:35 am |
|
7th Post |
|
oagaspar Site Founder 
|
Sorry to see that CJ!....never seen a bezel insert fall out under any circumstances let alone a 1000m dive watchcoyote2.gif just goes to show what one incident can do to others opinions when something goes wrong on a higher end watchwatch2.gifWatchbuys has a good rep so they should replace the insert ...I would call them rather than e-mailhand6.gif
|
||||||||||||||
| |||||||||||||||
| Posted: Thu Jul 5th, 2007 10:10 am |
|
8th Post |
|
chris s. 3T WIS 
|
Dude that Blows!!! Sorry to hear that ,I've always heard good things about Limes.
|
|||||||||||||
| ||||||||||||||
| Posted: Thu Jul 5th, 2007 12:09 pm |
|
9th Post |
|
Matt V 3T WIS
|
No big deal and it looks worse than it actually is; get a new bezel insert and glue it on. Your reseller should be able to get you the part and they aren't big $$ (unless you own a Rolex ;) ). Just make sure to properly clean the surface before applying the glue (remove all of the old glue and keep it dust/fat free). A good reminder to always make sure to rinse your watch in clean tap water after you had it on the pool (chlorinated water) or shower/bath (something you should never do because of the temperature and chemicals in shampoo). Not sure why anyone would think a warranty would cover a scratched or lost bezel inlay (warranty typically pertains to quality of material and workmanship); an inlay could fall off if the glue was disolved by chemicals or salt (seawater) or mechanical stress (you may have hit something inadvertantly or got it stuck somewhere without noticing which may have ripped it off without your knowledge or the watch/inlay/glue went through an extreme temperature cycle) and both would be the users or owners responsibility. I can tell you from experience that to remove an inlay in order to replace it can be tough and frustrating as they usually sit very tight, but under the right (wrong) circumstanzas I can see it happen (e.g. watch heated up in the sun / solar load and all the metal parts hot and expanded, than exposed to cool water and the metal and glue contracting at different rates, a tiny hit on the inlay may just be enough to loosen it from the glue). By the way, many brands these days use glued on bezel inlays, Rolex e.g. has "friction" (pressed in) inlays and both methods have their advantages/disadvantages). Cheers Matt 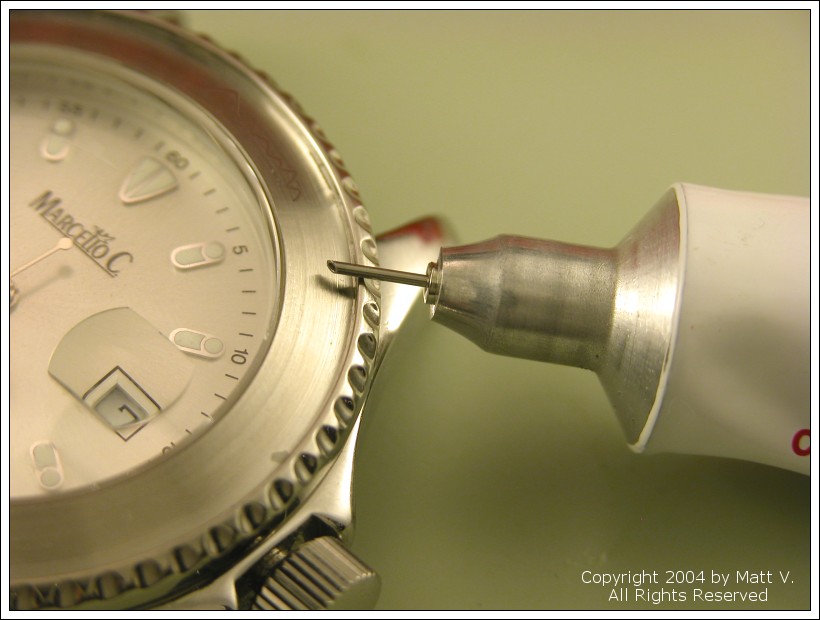
|
||||||||||||||
| |||||||||||||||
| Posted: Thu Jul 5th, 2007 12:17 pm |
|
10th Post |
|
Matt V 3T WIS
|
Here's a little "DIY" post on bezel maintenance that might help! :) Most diver bezels on watches are built the same way or at least very similar, so hopefully this pictorial will help with some of the basics for maintenance: removing the bezel, cleaning the parts or replacing a scratched inlay. Todays "victim" is my silver dial Tridente. The inlay is scratched and needs replacement and I am taking this opportunity to clean and lube the bezel as well. First step: remove the bezel.  You can see a little ridge in this photo. This is where you'd carefully slide in a blade (e.g. watchmakers knife) and than apply pressure while you slowly turn the bezel to pop it off. If you're planning to remove the bezel with a blade, I absolutely recommend you use scotch tape and tape off the case and bezel to avoid accidently scratching the metal. Bergeon offers a great tool to remove bezels which I am planning to use for this pictorial. 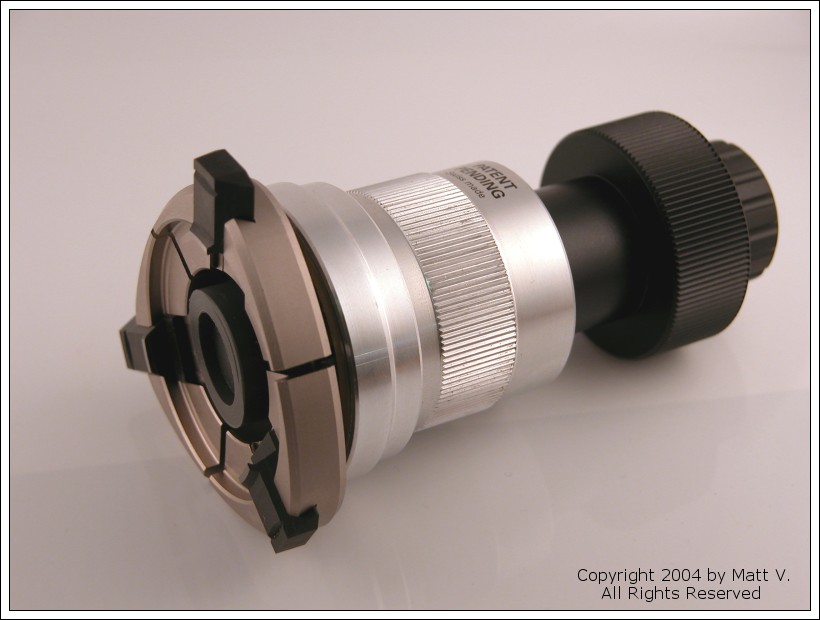 You can see the 3 "claws" that grab onto the bezel in this photo. 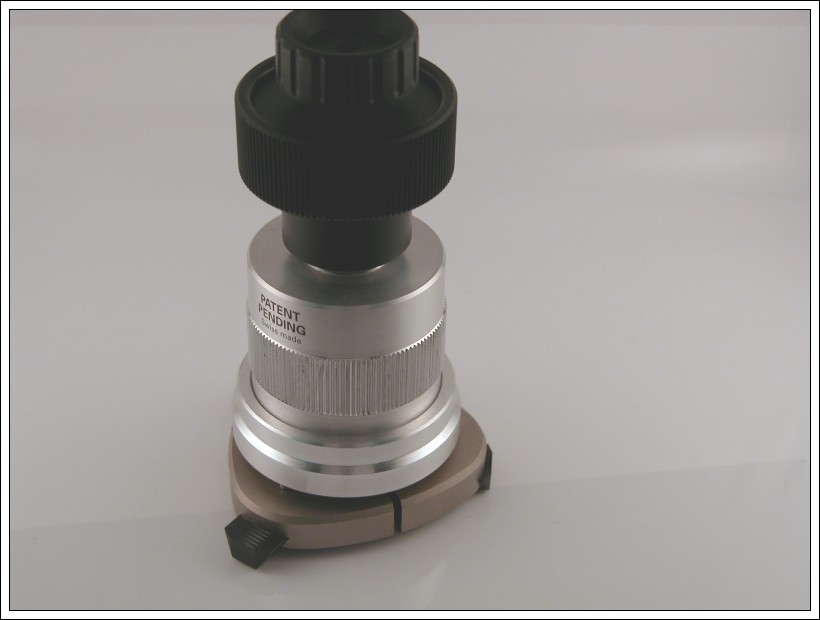 Basically the tool is set on top of the watch, the claws are tightened to hold on to the bezel... Basically the tool is set on top of the watch, the claws are tightened to hold on to the bezel... 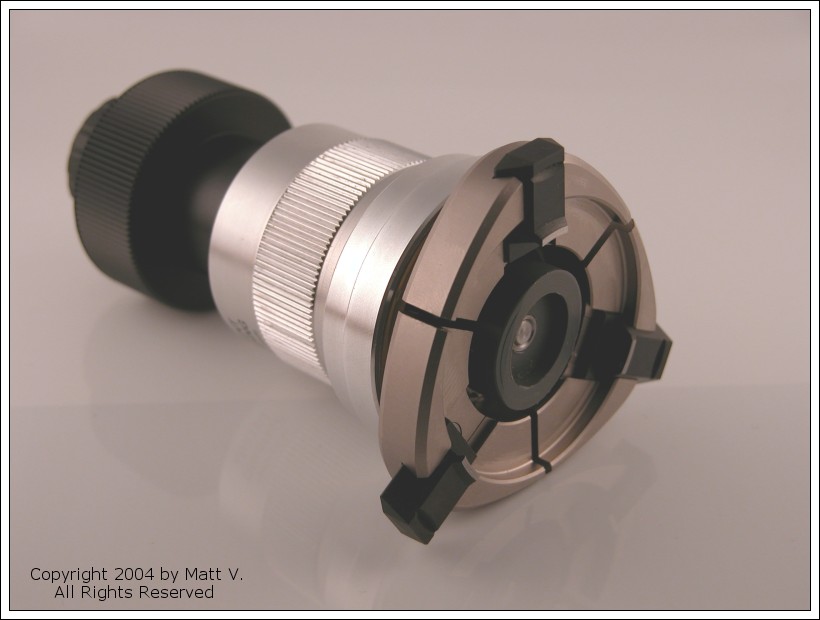 ... and when you turn the knob on the bezel tool, a small rubber die presses against the watch in an angle which pops off the bezel. 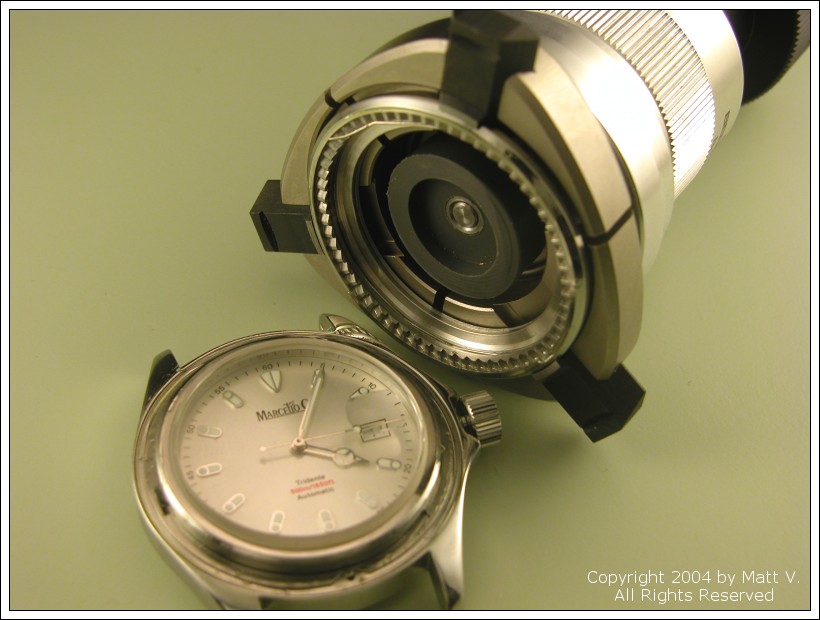 Works great! Works great! 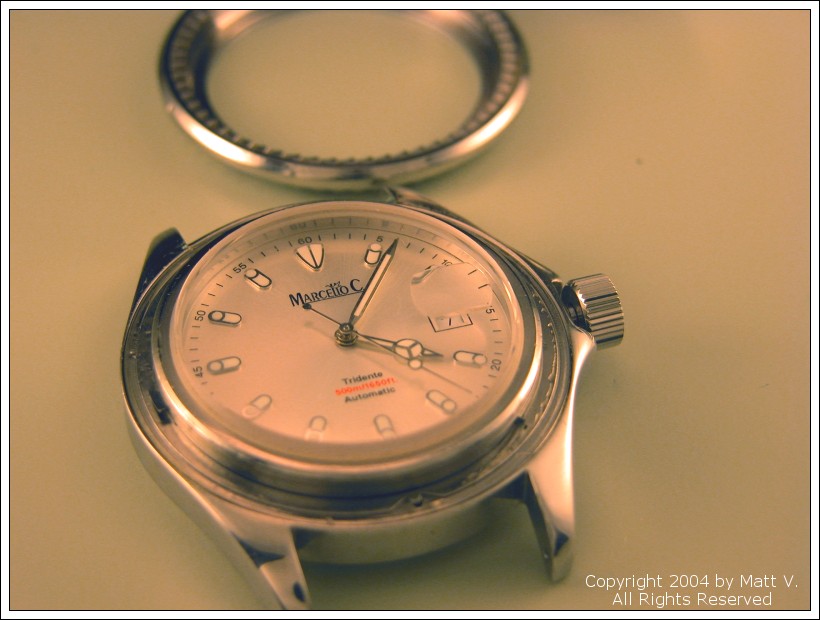 The bezel is off: be careful not to loose some of these parts: 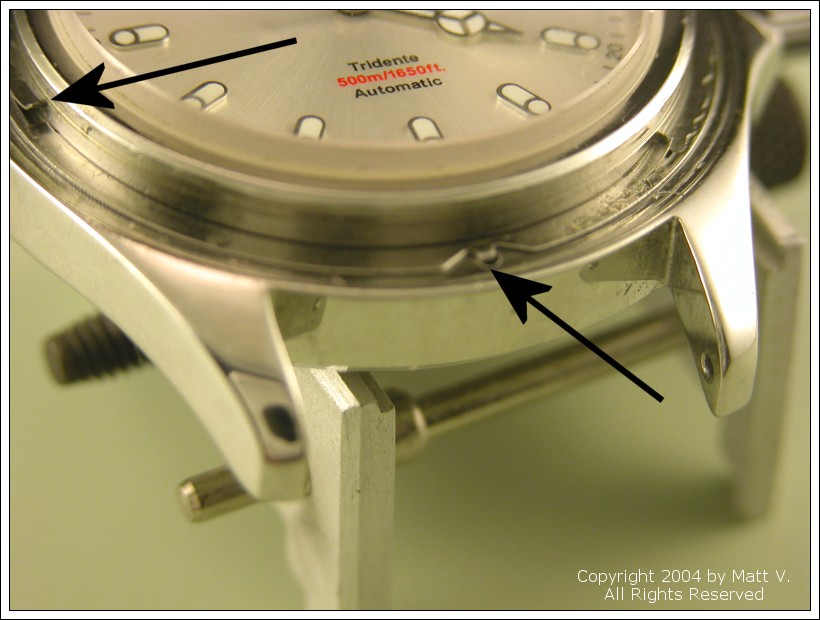 You can see a flat metal "washer" with parts that are bent upwards (see left side of the photo) and a part that is bent down keying into a dent in the case (see on the bottom). This is the spring responsible for the ratcheting "clicking" sound and action. By bending the metal parts up a little higher or lower you can stiffen or soften the ratcheting action of the bezel!  Here you can see one of those bent metal ratchets as well as the ridge on the case that is responsible for holding down the bezel. Did you notice how thick the crystal really is (usually covered up by the bezel)? 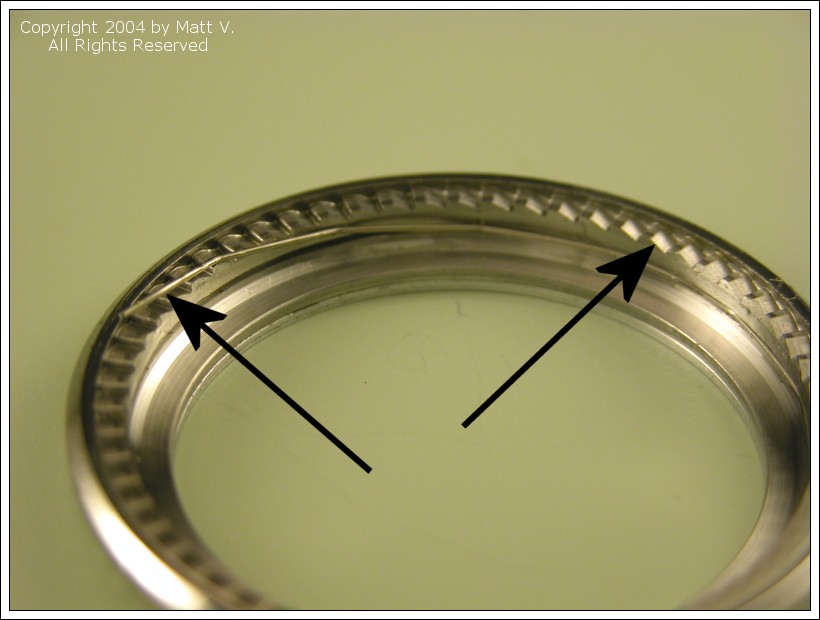 Here you can see the counterpart; the inside of the bezel. Those metal "steps" are the ones that "click" over the ratcheting springs and only allow the bezel to be turned in one direction (uni-directional bezel) . That little wire that is bent in segments and goes into the groove on the inside of the bezel is what's holding the bezel onto the case. This wire isn't perfectly round and straight segments "peak out" when it is inside the groove. These segments sit underneath the groove of the case thus securing the bezel to the case. Simple, but pretty neat! 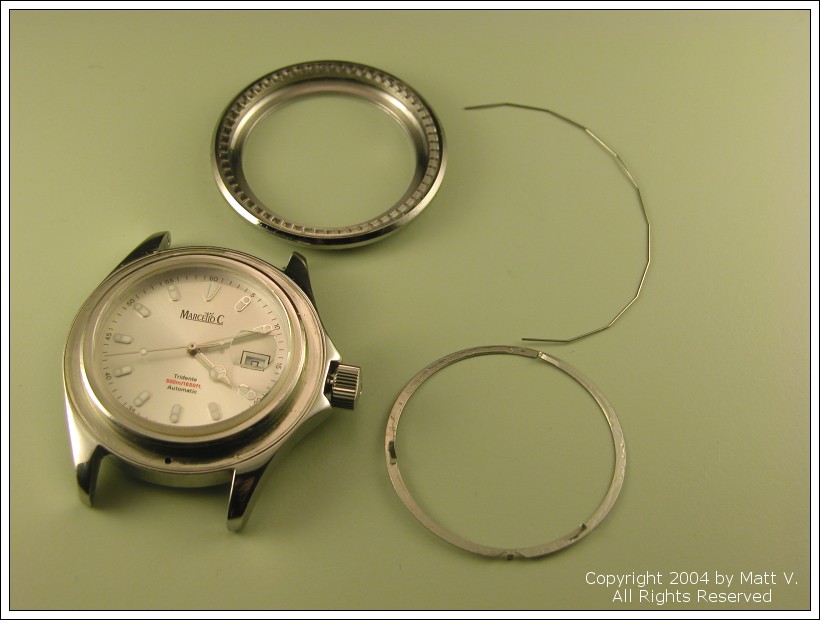 So these are the 4 parts you should end up with if you take it all apart. Make sure not to loose any, OK? 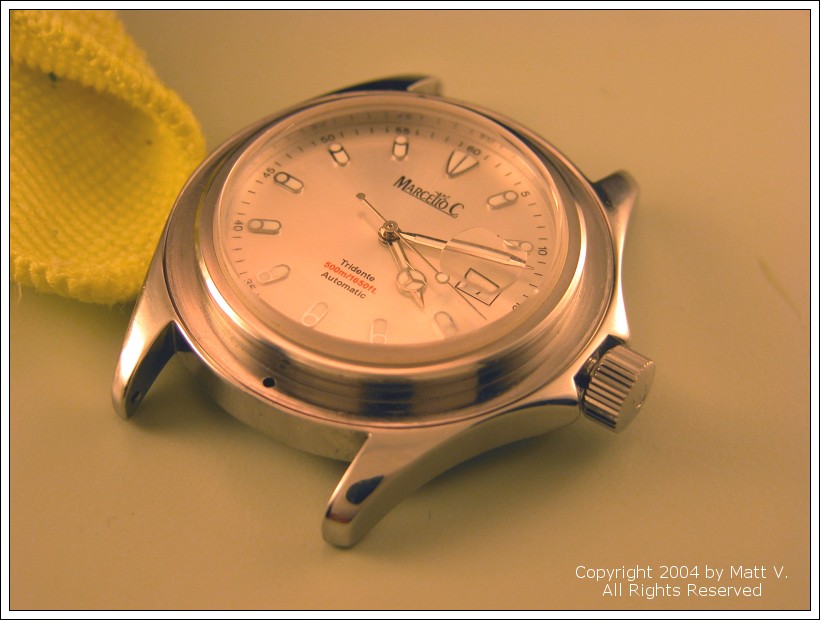 First, clean the case with a soft piece of cloth, soap and warm water (I use Windex) to remove dirt, sand or anything else that might have collected here. Clean the metal washer as well. 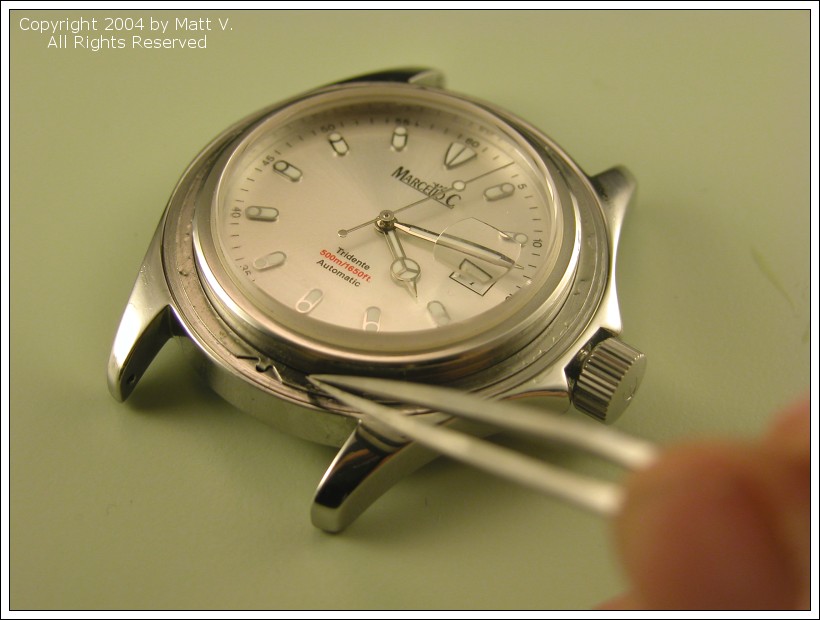 Than, put it back on and lubricate it (I use Moebius classic oil). 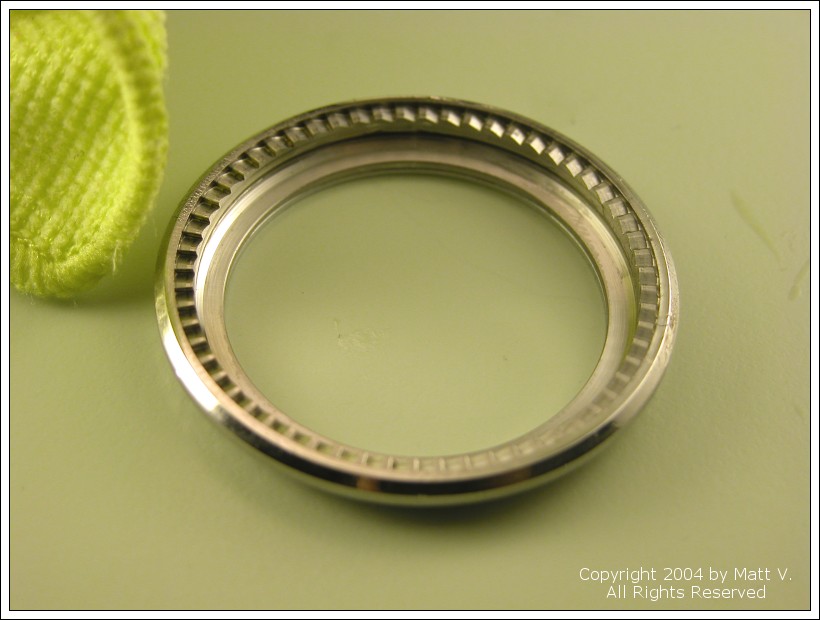 Next, clean the bezel. I want to remove the inlay next, so I am just wiping it off right now. 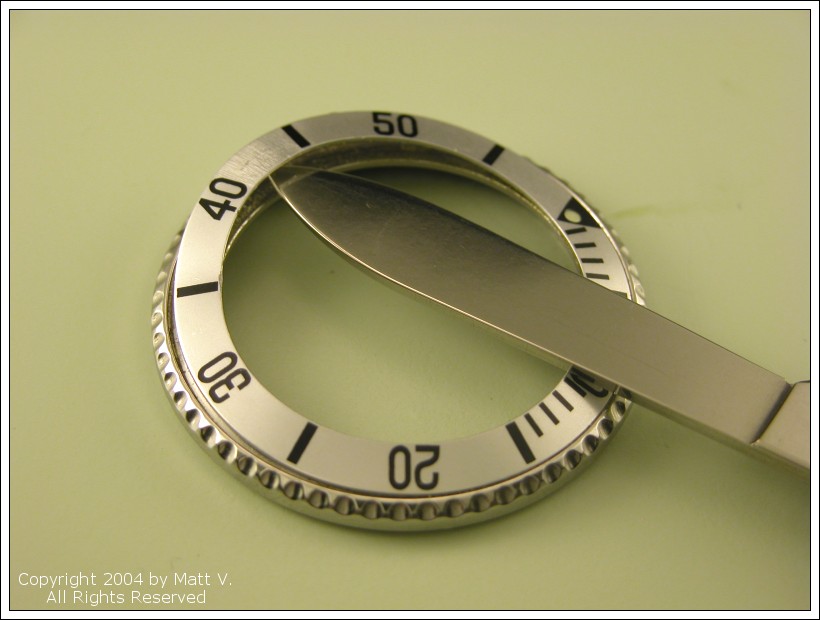 The bezel inlay is an aluminum ring that has been glued to the steel bezel, so in order to remove it I am using a small, sharp blade (watchmakers knife) to cut in between the bezel and the inlay and to lift the inlay up. Be caserful not to cut yourself, it sometimes requires a bit of force to slide underneath the inlay and to lift it off from the glue. You can cut into the inlay when the bezel is attached to the watch, but be careful not to slip wth the blade and to cut yourself (or scratch the watch)! The blades slim enough to cut underneath typically are the really sharp ones.  It is really not that difficult and gets easier once you've done it a few times, but don't be afraid to try this yourself as long as you're careful with the knife. 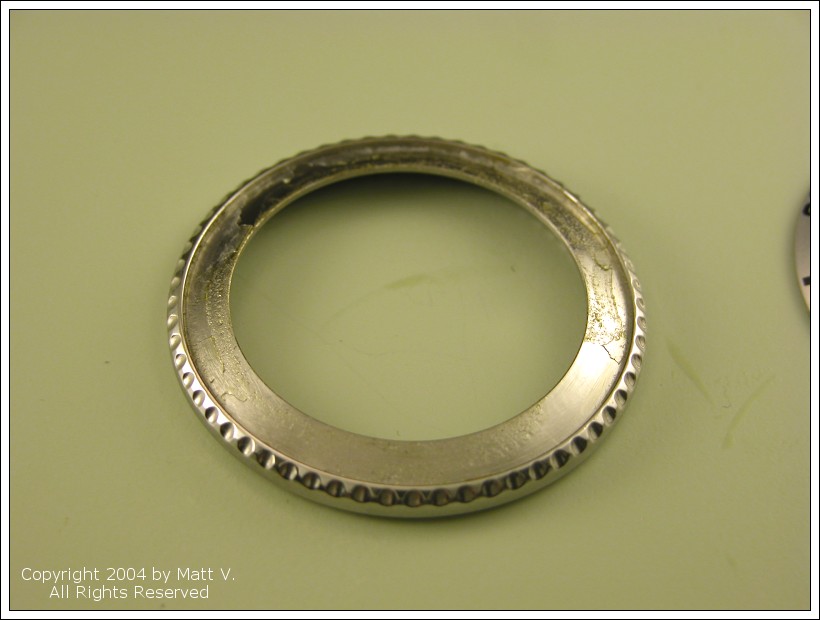 Now you can see the leftovers of the glue on the bezel. This is what we need to clean up before we can glue the new inlay on. 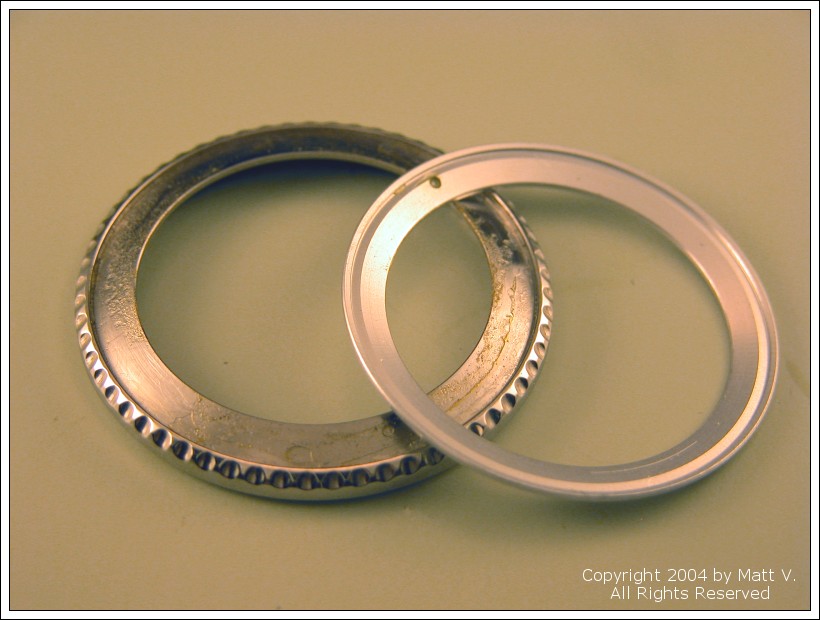 Can you see how smooth, nice and clean the new inlay is that will get glued on soon? Let's get that bezel into ship shape as well! A word on inlays; aftermarket inlays can be had in all sorts of sizes, but make sure to get the correct inner and outer diameter as well as angle in which the inlay is shaped (they are typically not flat)! I recommend alcohol to clean up the remains of the old glue. A piece of wood works great to help scrape off the more sticky parts (and the wood won't scratch the bezel). My lathe comes in handy for cleanup jobs like this and at the same time helps me get a better surface for the glue. Just keep in mind that the surface needs to be clean and free of oil, fat or fingerprints for the glue and new inlay to stick properly! 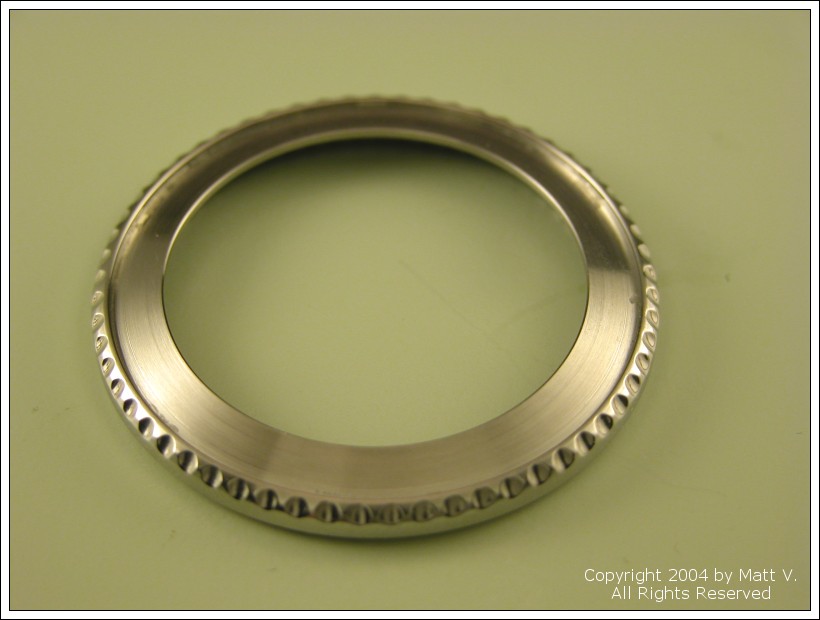 Here's an important tip: don't glue the inlay on with the bezel off the watch. In order to line it up properly with the markers, having the bezel on the watch helps tremendously! So now's the time when you want to clean up the bezel nicely, but the wire spring back into the groove of the bezel and push it back onto the watch case. It should simplu snap on; try it out and make sure it moves freely and is secure. 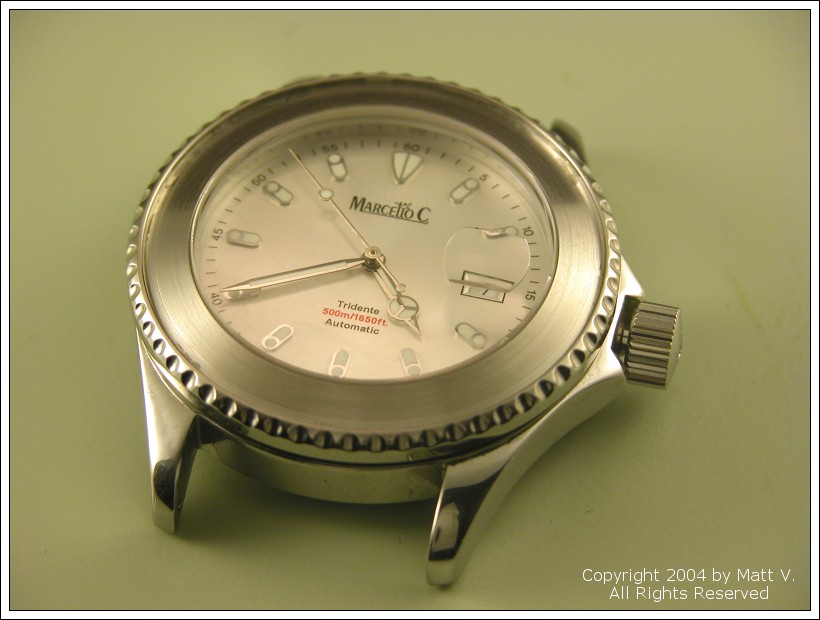 Looks weird, doesn't it? Allright, here comes the glue. Most glue will work, miracle glue/instant glue/contact cement is used very often and this is the glue I use (mainly because of the precision applicator). 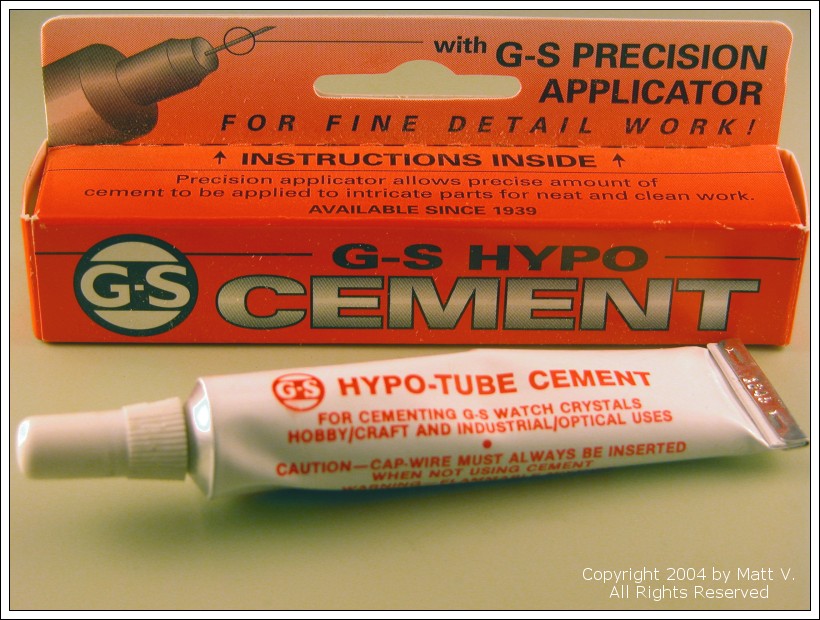 This glue is also used for watch crystals, but again; for getting a new bezel inlay to stick to the bezel, a less expensive glue will do as well. 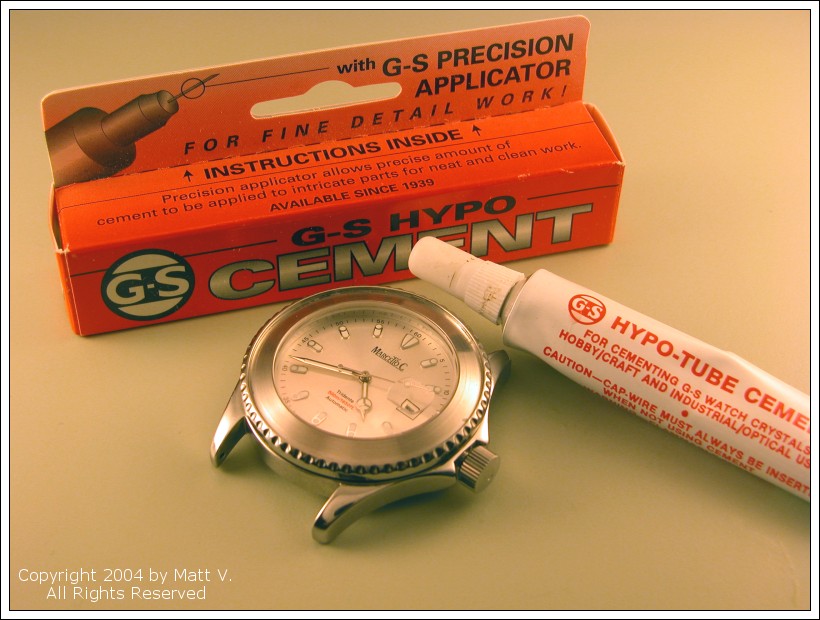 Now make sure you've got everything ready because you will need to be quick to get everything done before the glue cures. 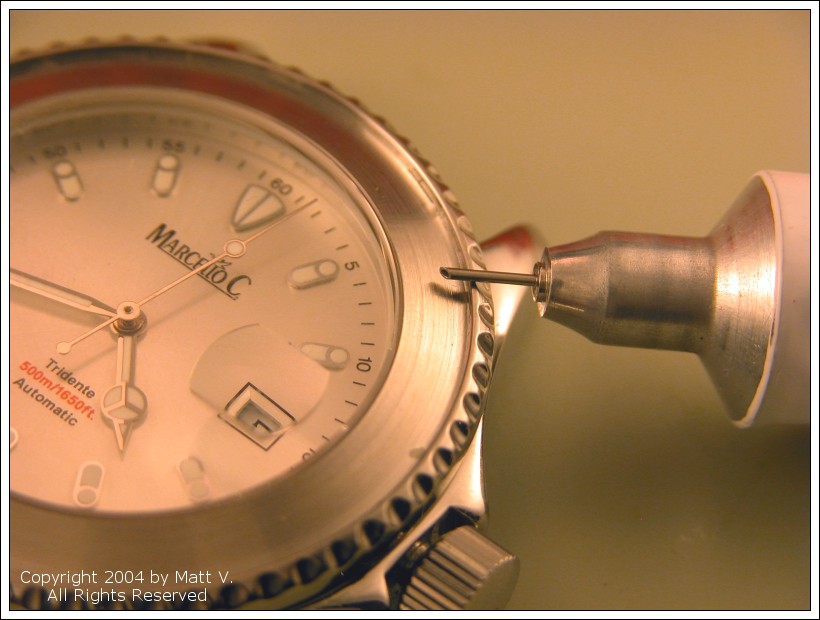 Spread the glue on the bezel. Be careful not to use too much but make sure you get glue evenly across most of the bezel. And make sure not to get any glue in between the crystal and the bezel; that would be bad! Now carefully drop the inlay onto the bezel. Make sure not to touch the bottom of the inlay with your fingers to avoid getting fingerprints/fat onto the surface. Make sure you have the inlay roughly aligned because now you'll have to be quick before the glue cures and you won't be able to make large alignements. 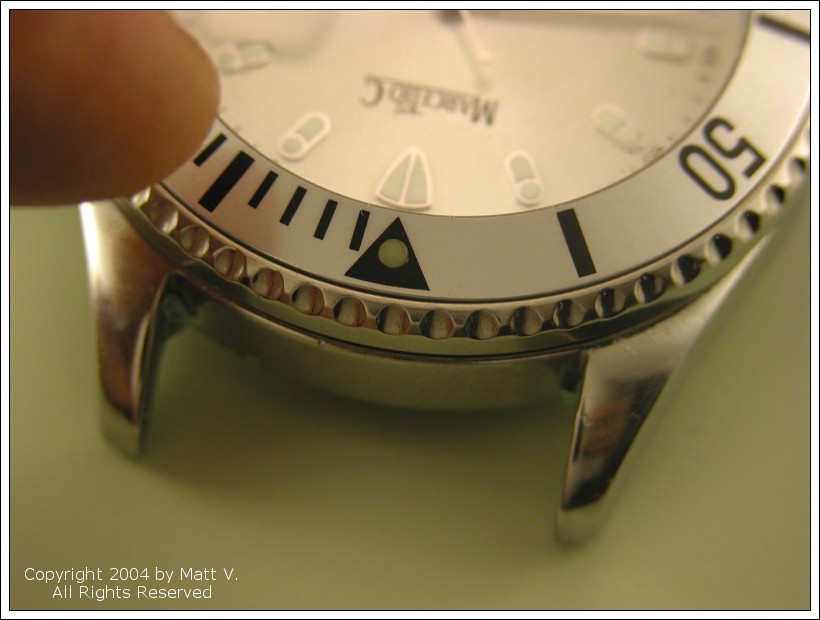 Some quick pushes and it aligns perfectly. Than I use a piece of fabric to clean up the top of the inlay, push it down throughly against the bezel to make sure the glue catches on evenly and everywhere. Look carefully for glue being squeezed out and remove it immediately. 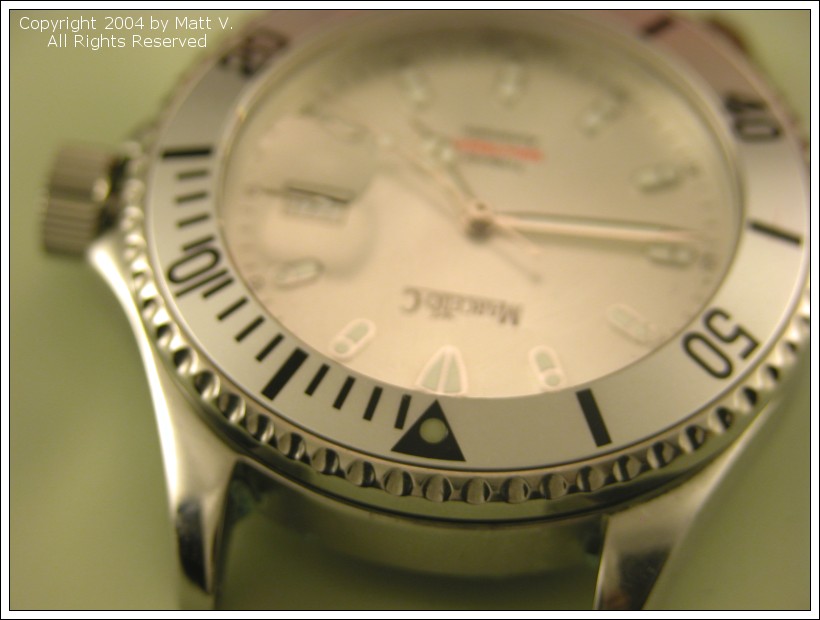 And that's it! Give the glue a chance to cure at least overnight before you expose the watch to water again and enjoy the restored look! Cheers Matt
|
|||||||||||||
| ||||||||||||||
| Posted: Thu Jul 5th, 2007 12:24 pm |
|
11th Post |
|
oagaspar Site Founder
|
Nice tutorial Matt!cool10.gifI would like you to install a red bezel insert on my Tridente once you receive it if possible and you have a red bezel insert...I think it would look Awesome on my black Tridente!hand6.gif
|
||||||||||||||
| |||||||||||||||
| Posted: Thu Jul 5th, 2007 12:57 pm |
|
12th Post |
|
KenC Admin
|
All very interesting, and not to be argumentative, but to me all of this hocus-pocus about chemicals, soap, shampoo, etc....does not compute. We also have the technologies in adhesives to make the glues impervious to chemical agents except those specifically designed to release the adhesive when properly applied. When I read things like this that tend to absolve the manufacturer of responsibility for poor workmanship/material when something like this happens, I get a little upset. I recognize that this may be the watch manufacturer's, but I also recognize the common sense and experience of the buyers...and virtually all reasonable people would consider an incident like this, especially happening to a WIS who takes great care of his watches, as a manufacturer's responsibility. It is, in fact, an isolated incident of poor workmanship and/or material. If a piece of exterior trim falls off of my warranted automobile, the manufacturer does not tell me about heat, extreme conditions, road salt, chemicals, sea spray, commercial car washes, pollutants, etc. He simply repairs the cars and says, "sorry"! I do appreciate the tutorial on replacing a bezel...very interesting and informative!
|
|||||||||||||
| ||||||||||||||
| Current time is 12:49 am | Page: 1 2 3 4 |
| TimeTechTalk.com > Time Tech Talk > Time Talk > HELP | Top |


